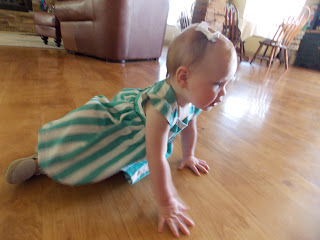
I've made another dress. And guess what. This time it fit! Woohoo!
 |
| She likes it! |
Okay, before I start this tutorial, I should probably let you know, I am definitely not a professional seamstress. So be nice. I'm a beginner. (But that also means that if I can do it, so can you!)
This is what I started out with:
 |
| One X-large men's dress shirt, and one dress that fits Elsie |
First, take the pocket off the shirt. Then cut two lines across the shirt. This will be the skirt.
Next, take that dress that fits your baby and trace the front bodice onto the fabric. Leave about 1/4"-1/2" all the way around for seam allowance.
 |
| It doesn't have to be perfect. |
Pin and cut out 2. Fold the fabric in half so the sleeves are symmetrical.
 |
| You should be cutting through 4 layers of fabric. |
 |
| It will look something like this. |
Use what you just cut out (folded in half) to trace the back pieces. Pin and cut (should be 4 of these)
 |
Add about an inch on the folded side and make the neck line a little higher.
I used the sleeves to make these back pieces. |
I also used the sleeves to cut out the sleeves. That way you don't have to sew a hem. I don't have any exact measurements, but keep in mind, you can always cut it smaller if it's too big.
 |
| This is how the sleeves look when I cut them. They are folded in half. |
And now you have all the pieces cut out! Here's what they all look like.
Now it's time to start sewing!
 |
| I like to sew up the front so it won't unbutton. |
Cut the back of the skirt and sew it from the bottom up, leaving a few inches. We'll come back to this later.
 |
| Sew right sides together. This fabric was the same on either side, though. |
Hem the bottom of the skirt.
Pin and sew (both the lining and outer layer) the bodice pieces together.
 |
| I used the piece of fabric with the ugly marks from the pocket as the lining. |
 |
| Sew 1/4 inch seam |
 |
| Now you will have 2 identical pieces sewn |
Now you will sew on the sleeves.
Make large stitches along the curved side of the sleeve and gather.
 |
| Then sew the smaller ends. Right sides together. |
This next part is a little bit difficult to show you, but I'll do my best to explain the pictures.
 |
| This is the outer layer with the sleeve pinned to the arm hole. Right sides together. |
I realized after sewing the sleeve on that I forgot to sew the lining on as well. Basically, you want both right sides facing the sleeve so all the raw edges will be hidden.
 |
| The outer layer is on the left, the lining is on the right. |
Now, for the other sleeve, I lined up where I wanted it to go and just pinned it in a similar way to the first sleeve, with the right sides of each layer facing the sleeve. You sort of have to push the lining through the sleeve. Hard to explain, but you will understand when you get there.
 |
| Lining up the sleeve. |
 |
| Now you will have the lining and the outer layer sewn together by the sleeves. |
Turn this inside out (everything will kind of be stuffed in the shoulder area), and sew the neck line and down the back where the buttons will be. Do NOT sew the bottom.
 |
| Sewing the neckline |
Clip the corners of the neck line so it will lay flat when you turn it right side out.
 |
| Whew! The hard part is done! |
Now all you have to do is sew on the skirt and the button (& button holes). Skirt first:
 |
| Gathering the skirt |
 |
| Pinned to the bodice. Right sides together. |
 |
| Sew them together! |
Done! Let your cutie wear that dress!


Your so amazing Kaelyn!! I love it!
ReplyDelete