Saturday, September 07, 2013

Hi Again

Well, it's been way too long! My sister has practically been begging me to update my blog. I guess I just haven't felt much like a blogger the past few months. You know, like the kind of person who just sits down and has awesome pictures and the perfect words to share with everyone. But that's no excuse. So here I am.

June:

Elsie turned 1.
So I made her a ONEsie (haha),

And a birthday cake,

 Which she very cautiously bit into, and thoroughly enjoyed.

The next week we had Elsie's first birthday party! It was a cupcake theme. Get ready for an overload of pictures!

my homemade cupcakes

all set up before everyone arrived

You can see my sister from Washington on the right


The cutest smile


The smash cake

The smashed cake

Too much sugar

Elsie's favorite toy turned out to be this balloon

July:

My little sister Sarah left on her mission to New Jersey!

Here she is with Elsie and Quinn (second cousins?)

And we had some family pictures taken

Then... Ashley, Elsie and I went to South Africa for a whole month! I think those pictures will have to come in another post. But it was great! It was Elsie's first time meeting Ash's family. Also, Ash and I spent our 2 year anniversary there. <3 Love you, babe!

Now it's bath time and then bed time. But before I leave, I must show you a picture of Elsie's hair!

It's curly!

Okay, two pictures. I did a ponytail in her hair today.

Monday, June 03, 2013

8 Teeth

This post isn't so much about Elsie's teeth as it is an update. Here she is. 2 days ago.


Elsie is now 11 1/2 months old.

She does have 8 teeth. And she looks so much less like a baby and so much more like a toddler now.

She walks everywhere now! I don't know if I ever mentioned that she had started taking steps here and there. But this past week, her preference changed from crawling to walking -- almost running!

She blows kisses


She claps her hands ( no video of this yet... )

She just figured out the whole finger pointing thing


And her hair is just barely long enough to do little pigtails. Not that it ever lasts more than 5 minutes

Also, can you tell I just started this whole instagram thing?

Friday, May 10, 2013

Sew a Baby Dress With Me!

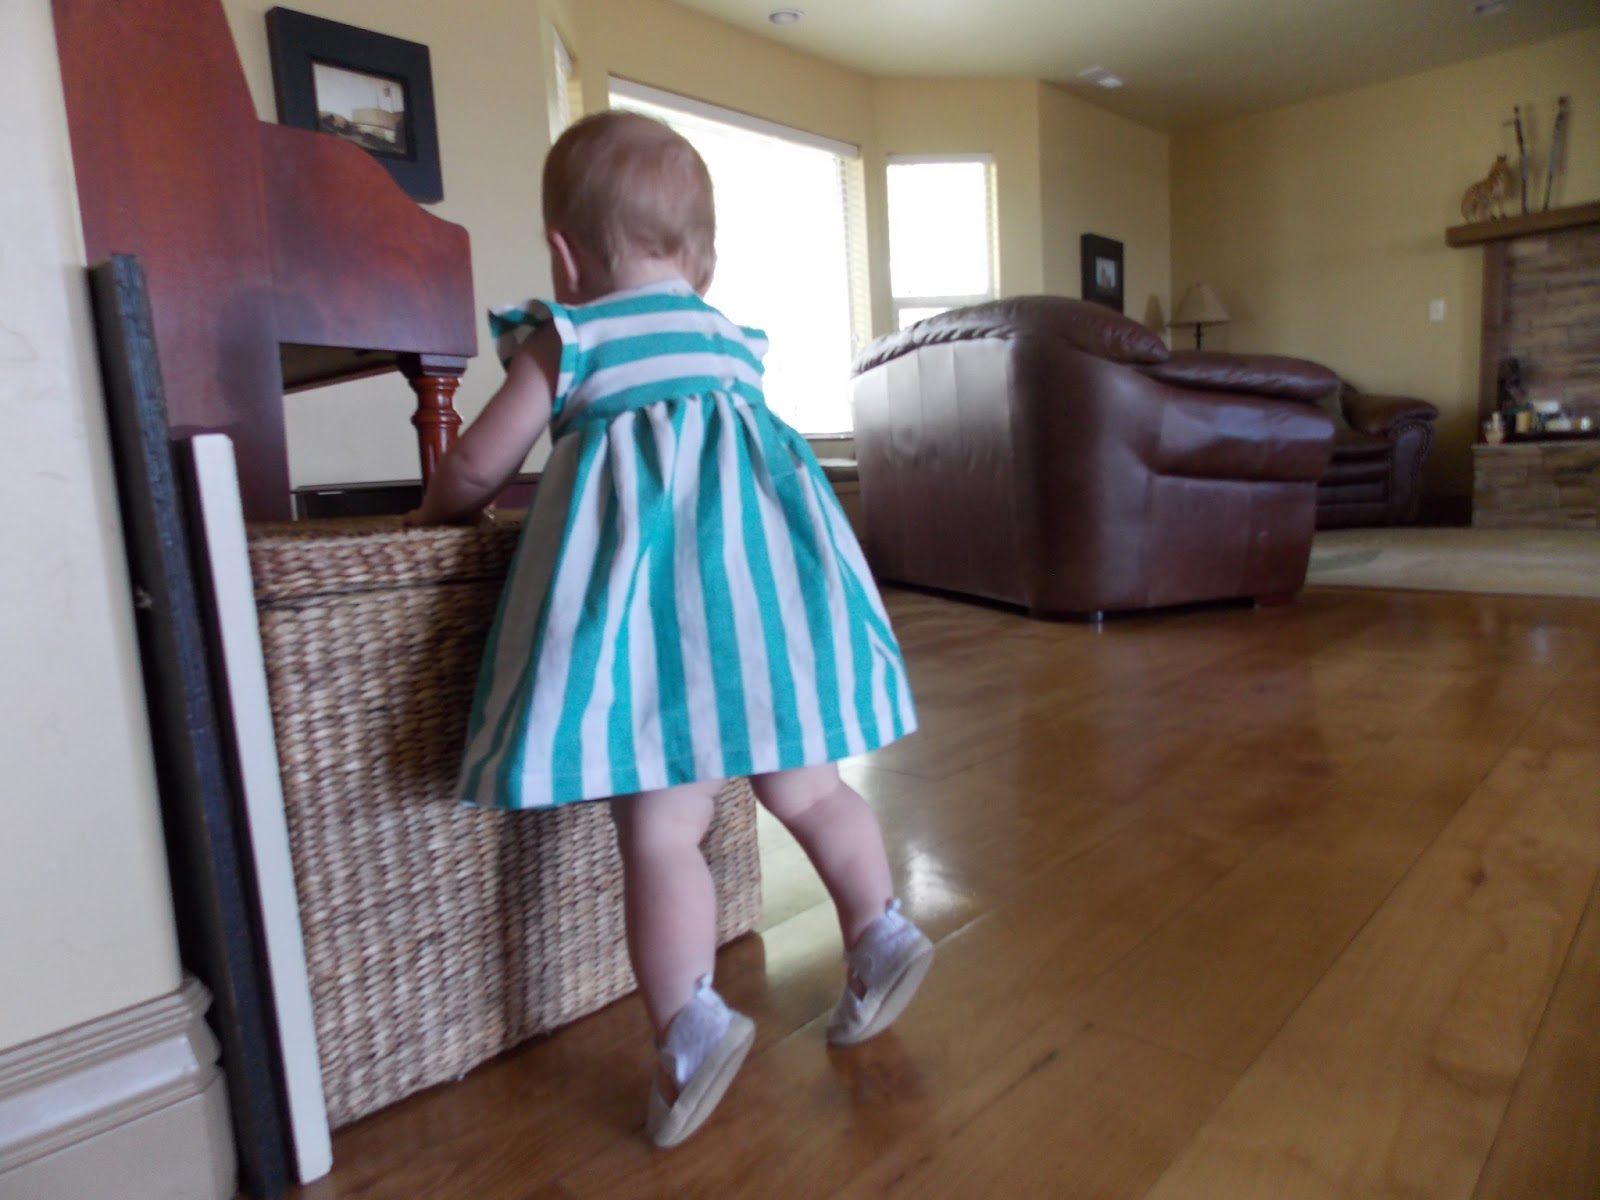
I've made another dress. And guess what. This time it fit! Woohoo!

She likes it!
Okay, before I start this tutorial, I should probably let you know, I am definitely not a professional seamstress. So be nice. I'm a beginner. (But that also means that if I can do it, so can you!)

This is what I started out with:

One X-large men's dress shirt, and one dress that fits Elsie
First, take the pocket off the shirt. Then cut two lines across the shirt. This will be the skirt.


Next, take that dress that fits your baby and trace the front bodice onto the fabric. Leave about 1/4"-1/2" all the way around for seam allowance.

It doesn't have to be perfect.
Pin and cut out 2. Fold the fabric in half so the sleeves are symmetrical.

You should be cutting through 4 layers of fabric.

It will look something like this.
Use what you just cut out (folded in half) to trace the back pieces. Pin and cut (should be 4 of these)

Add about an inch on the folded side and make the neck line a little higher.
I used the sleeves to make these back pieces.
I also used the sleeves to cut out the sleeves. That way you don't have to sew a hem. I don't have any exact measurements, but keep in mind, you can always cut it smaller if it's too big.

 This is how the sleeves look when I cut them. They are folded in half.
And now you have all the pieces cut out! Here's what they all look like.


Now it's time to start sewing!

I like to sew up the front so it won't unbutton.
Cut the back of the skirt and sew it from the bottom up, leaving a few inches. We'll come back to this later.

Sew right sides together. This fabric was the same on either side, though.
Hem the bottom of the skirt.


Pin and sew (both the lining and outer layer) the bodice pieces together.

I used the piece of fabric with the ugly marks from the pocket as the lining.
Sew 1/4 inch seam
Now you will have 2 identical pieces sewn
Now you will sew on the sleeves.

Make large stitches along the curved side of the sleeve and gather.


Then sew the smaller ends. Right sides together.
This next part is a little bit difficult to show you, but I'll do my best to explain the pictures.

This is the outer layer with the sleeve pinned to the arm hole. Right sides together.
I realized after sewing the sleeve on that I forgot to sew the lining on as well. Basically, you want both right sides facing the sleeve so all the raw edges will be hidden.

The outer layer is on the left, the lining is on the right.
Now, for the other sleeve, I lined up where I wanted it to go and just pinned it in a similar way to the first sleeve, with the right sides of each layer facing the sleeve. You sort of have to push the lining through the sleeve. Hard to explain, but you will understand when you get there.

Lining up the sleeve.

Now you will have the lining and the outer layer sewn together by the sleeves.
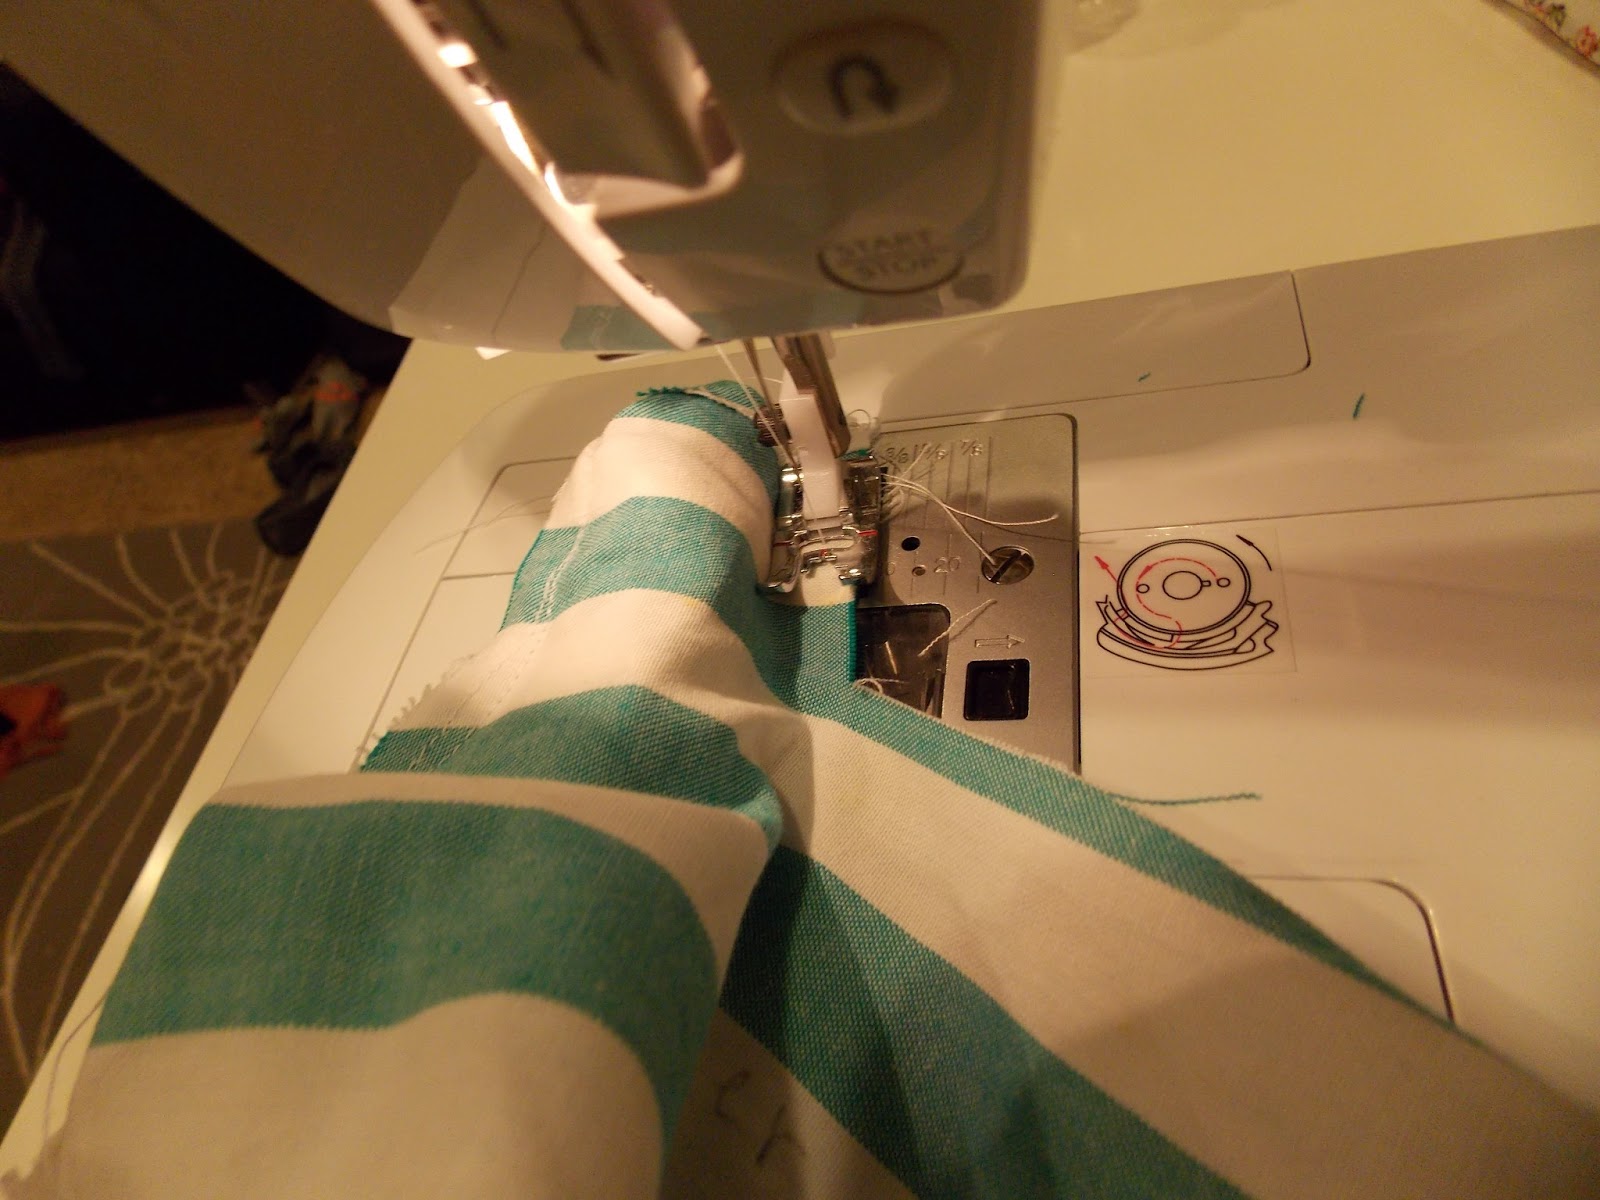
Turn this inside out (everything will kind of be stuffed in the shoulder area), and sew the neck line and down the back where the buttons will be. Do NOT sew the bottom.

Sewing the neckline
Clip the corners of the neck line so it will lay flat when you turn it right side out.

Whew! The hard part is done!
Now all you have to do is sew on the skirt and the button (& button holes). Skirt first:

Gathering the skirt

Pinned to the bodice. Right sides together.

Sew them together!
Done! Let your cutie wear that dress!


Monday, April 29, 2013

Diaper Dilemma

To all other moms out there: How many of you have had to fight your baby every diaper change to get her/him to lay still?

Elsie's diaper changes are starting to be something I dread. A few days ago, she successfully grabbed a handful of poo while I was changing her. A couple of weeks before that, she crawled away from me (bare bummed) before I could even clean her up. It made a mess. She is the most wiggly little girl I have ever seen!

How do you guys deal with this? Here's my solution:

Sometimes I think moms should have more hands.
Any more ideas would be much appreciated.

Also, coming soon...

... a dress tutorial!

Thursday, April 18, 2013

A Too-Small Dress

Recently, Ashley got me a sewing machine. I've been experimenting with making clothes for Elsie since then. 

Here's the latest experiment:


I made it while Elsie was already asleep for the night, so I was REALLY excited to put it on her the next morning. I'm sure you could imagine my utter disappointment when I realized the dress was too small.

Oh well! I guess I'll have to make another!

(P.S. If you would like to see a tutorial, let me know.)

Also, I got this shirt at DI. I would not do this with an expensive, brand new dress shirt.

Thursday, April 11, 2013

Baby-Friendly Jewelry

I'm pretty sure most babies love jewelry. Elsie is no exception! It can be a struggle to find jewelry that will keep the baby amused without being a choking hazard, so I decided to make my own! 


Gorgeous, isn't it? Why, it's the latest fashion! It matches with everything, since it has every color on it. It's very versatile - I can change it to adapt to whatever Elsie is interested in playing with at the time...

When she's teething,
Hungry,
Cold,
When she wants to read books,
...You get the picture. 

Now, the only trick is actually wearing it in public... (Hah! Never going to happen...)